Showing posts with label construction paper. Show all posts

Friday, June 3, 2016

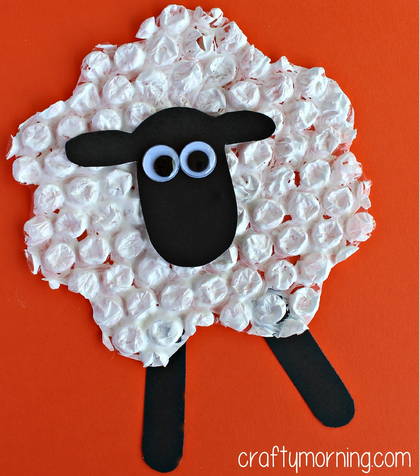
Bubble Wrap Craft!

Oh, the many crafts that can be made with bubble wrap!

Make a sheep like the one in the picture, or make another animal of your choice. Here is the link for instructions: http://www.craftymorning.com/bubble-wrap-sheep-craft-kids/. I think the sheep in the picture looks like it could be from Shaun the Sheep, enjoy!

Friday, May 20, 2016

Coffee Filter Suncatchers!

Go catch some sun!

Here is a cute and easy craft to make with the kids: http://alittlepinchofperfect.com/ocean-animal-coffee-filter-craf/. Add some color to your playroom or any room with these suncatchers, make a few or make a bunch! Enjoy!

Saturday, April 16, 2016

Magazine Drawing Craft!

Let your child's imagination go on an adventure with this craft. It's cost effective, and you can do it almost anywhere.

Have your child cut out and gather images or pictures from their favorite magazines and paste them onto blank construction paper. Then they fill the rest of the page with images or scenery they make-up. Here is the link with detailed instructions: http://artfulparent.com/2015/01/drawing-prompts-for-kids-with-magazine-pictures.html. Enjoy!

Saturday, April 2, 2016

Styrofoam Tray Printmaking!

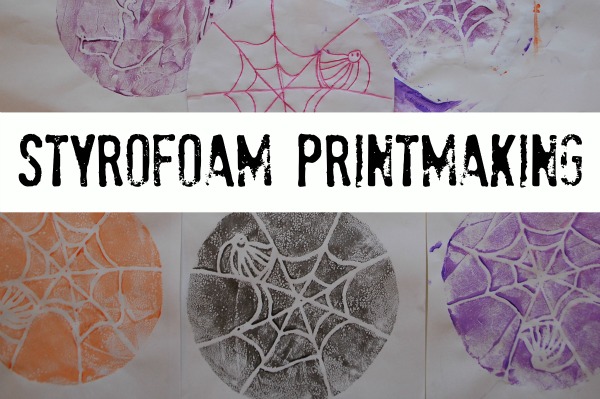
We did Styrofoam tray Printmaking for our Make-It & Take-It craft today. This was a pretty easy and fun craft for all ages, younger children will need help with their drawings.

Here is a brief description of how to do it:
1. Grab a spare (clean) Styrofoam tray and cut out a rectangle.
2. Using non-brush-end of a smaller paintbrush (or dull pencil) draw your picture on the tray.
     HINT: when writing names or words WRITE THEM BACKWARDS, because the child's name will be backwards if you write it the right way (mirror effect).
3. When your drawing is done, roll a brayer in paint so that it is completely covered. Then roll the brayer on the tray, completely covering that too.
4. Take the paint-covered-tray and put it face down on construction paper. Press or rub it so that way the paint spreads evenly.
5. Remove the tray and voilĂ ! You have just made your first Printmaking painting!

So much fun, and you can do it repeatedly. Also, use primary colors (red, yellow, blue) so you can mix other colors too or just overlap the colors! Oh, and do not forget to lay down newspaper for an easy clean up. Enjoy!
Saturday, March 19, 2016

Puffy Paint!

Don't put away your cocoa mixes just yet, it appears Winter demands one more day of snow before it is gone for several months.

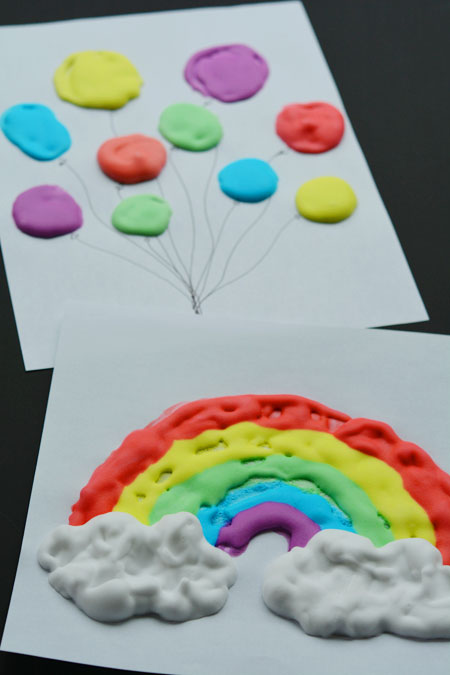
Here is a bright and colorful craft reminiscent of Spring that the kids can easily do: Puffy Paint! They can take turns adding, mixing, and making the paint.

Here is the link with detailed instructions: http://onelittleproject.com/how-to-make-puffy-paint/. Enjoy!

Saturday, January 23, 2016

Snowflake Stamping!

Do you and your little one love to paint? Do you also have extra pipe cleaners lying around that you've been meaning to use? Why not try and make a snowflake stamp painting using pipe cleaners?

Here is the link with detailed instructions: http://www.craftoart.com/2012/01/pipe-cleaner-snowflake-stamping.html. You can also use Tempera paint instead of acrylic paint. Plus, it is almost too chilly to be outside today so get cozy and be creative, have fun!

Wednesday, December 30, 2015

3D Hot Air Balloon!

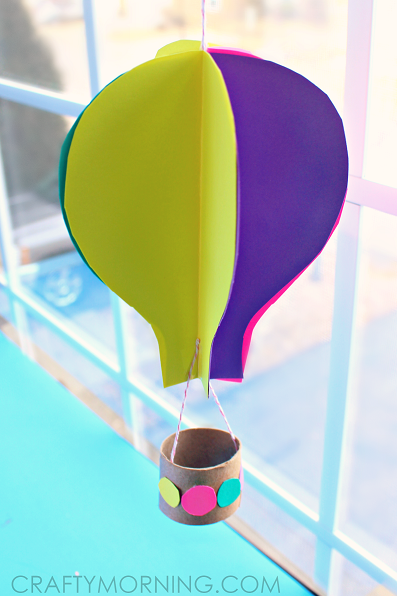
Whether you are indoors or outdoors today, try making a 3D paper hot air balloon with the kids, they can display and celebrate it after! Oh, and don't forget the hot chocolate even if you are not going outside today.

Here is the link to the website with detailed instructions: http://www.craftymorning.com/spinning-3d-hot-air-balloon-craft-for-kids-to-make/. Have fun!

Friday, November 20, 2015

Star Wars: Yoda Craft

I am designating today as a Star Wars themed craft day, because Star Wars: Episode VII is a month away from coming out in theaters!

This is a slightly labor intensive craft that you can do with the kids, and they will have a blast playing with them after. Or if they won't, I will and then my pets will have to endure it [cue the maniacal laughter]. Because there is no better playmate than a embarrassed pet that you have forced into dressing up for the sake of play, said the vegetarian...

Here is the link with detailed instructions: http://www.thissimplehome.com/2014/10/yoda-ears-headband-craft-and-tutorial.html. Have fun and see you next week!

Saturday, October 31, 2015

Halloween Printmaking!

Happy Halloween from everyone here at the Children's Room!

Today is also the last day of October, and I think that one more Halloween craft ought to be sufficiently appropriate before tomorrow (November 1st) is here.

On a side note: we have 8 weeks and 5 days left of this year already, just in case no one else has frightened you with that news yet!

Finally, today is going to be a printmaking craft day! Here is the link with detailed destructions, I mean instructions: http://tinkerlab.com/styrofoam-printmaking/. This might be a bit messy, but it is a really fun process that the kids will enjoy, and the clean up should be quick and easy enough! See you next week!

Saturday, October 24, 2015

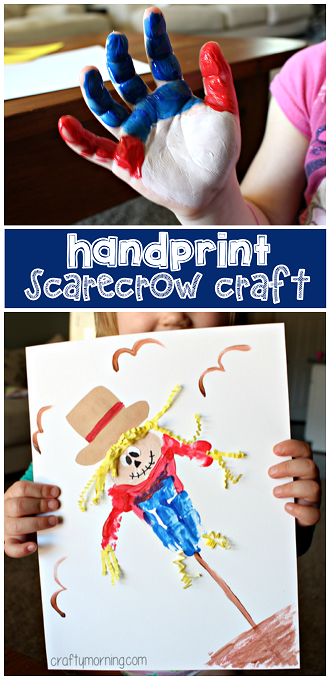
Handprint Scarecrow!

I am trying to hold off on Halloween crafts for next Saturday, because it is going to be the 31st next week and I think waiting until then will be more appropriate!

In the meantime, try to make a hand printed scarecrow with the kids. Here is the link with detailed instructions: http://www.craftymorning.com/handprint-scarecrow-craft-kids-make/. You can make this however you want, and it makes for adorable decorations as well!

Friday, October 9, 2015

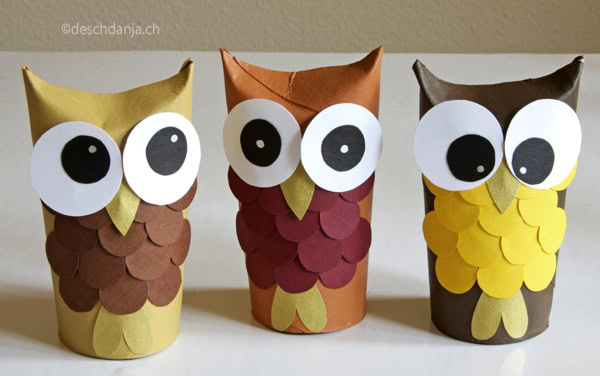
Toilet Paper Roll Owls!

Want to make a cute and simple craft with the kids? Try making toilet paper roll owls!

After painting the roll whatever color you would like it to be (you don't have to pain it at all), the construction paper pieces are glued on from the bottom up, for each owl you will need:
  1. 1 heart shaped piece for the feet
  2. 14 little circles for the tummy (see photograph for how the maker laid theirs down)
  3. 1 triangle for the beak (fold in the middle about half way)
  4. 2 big white circles for eyeballs
  5. 2 smaller black circles for the eyes.
  6. Lastly, to make it seem like your owl is looking at something, you may poke a hole in the black circles or finish them off with a metallic silver sharpie. A regular silver sharpie might not show up as well.
Here is the link with photo instructions http://www.handmadekultur.de/projekte/eulen-aus-papierrollen_66189. Yes, it is in German, but I also found this craft on pinterest. Good luck and enjoy!

Friday, September 18, 2015

Firework Painting!

Want to make something bright and fun with the kids? Why not try creating a firework painting?!

They will get to mix colors, play with straws, and have a blast making fireworks. Here is the link with detailed instructions: http://www.mykidsadventures.com/paint-fireworks/. This is a lengthy process because it involves painting on construction paper. If you want to expedite the process, I guess you could get a package of watercolor paper for a reasonable price and paint your background first, let that dry for a few minutes, and then start painting your fireworks.

If you do try this craft, please share with us how it turned out!

Saturday, September 12, 2015

Tissue Paper Apples!

We made these for our Make-It & Take-It drop-in craft program earlier today. Some people made rainbow apples (we put out blue and pink tissue paper too), which still looked really good!

The craft was inspired by this site: http://www.blissfulroots.com/2013/09/tissue-paper-apple-art-project.html?utm_source=feedburner&utm_medium=email&utm_campaign=Feed:+BlissfulRoots+%28BLISSFUL+ROOTS%29. So all you need is construction paper, tissue paper, and glue sticks. We also used brown crayons to color the stems. I think apart from gluing and piling on tissue paper, shredding and tearing the tissue paper was my favorite part!

Thursday, June 18, 2015

Another Ocean Theme: Hand-painted Crabs!

This week's craft is going to be all about hand-painting and gluing oceanic scenes!

Here is the link for inspiration and full instructions: http://steffenatelyblessed.blogspot.com/2012/03/ocean-lesson.html. Enjoy!

Saturday, May 23, 2015

Paper Cloud Mobile!

Make cloud mobiles with your kids!

Here is the link for full instructions: http://blog.hgtv.com/design/2013/05/07/weekday-crafternoon-diy-paper-cloud-mobile/. I am going to attempt to make my own today, so I will let you know how easy it was (or wasn't), and post pictures to prove it.

Enjoy!

Friday, May 8, 2015

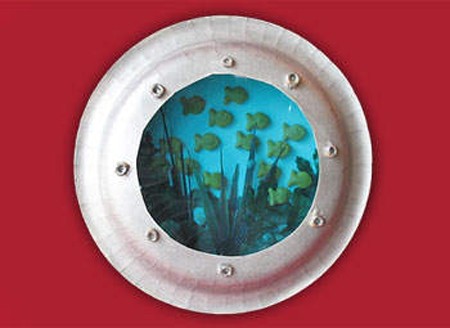
Paper Plate Porthole!

Let's try something a little different! Try making a paper plate porthole using miscellaneous materials around the house.

Here is the link with full instructions: http://craftsbyamanda.com/paper-plate-porthole/. Enjoy!

Friday, January 16, 2015

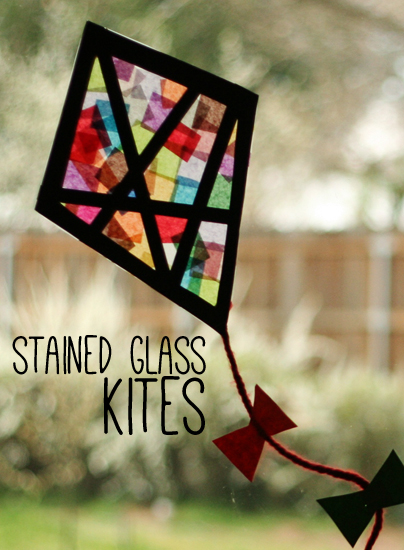
"Stained Glass" Paper Kites!


So, this is week two of inadvertently picking another paper themed craft! I apologize and I will try my best not to post the same theme back-to-back again... at least not for a while!

This craft is pretty simple, and it's okay if you don't have all the materials listed, which means you can always substitute it for something else!

I personally really like transparent or light-up crafts, and this one makes a quick and easy window decoration too!

The link for full instructions: http://www.makeandtakes.com/colorful-stained-glass-kites

Saturday, January 10, 2015

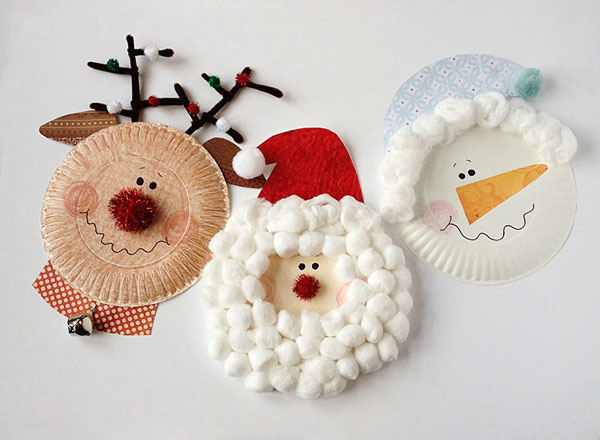
Paper Plate Characters!

Here is a cute idea: try making your favorite characters out of paper plates!

You can follow these directions to replicate Santa, Rudolph, or Frosty as they appear in the image, or create your own!

I bet it is also possible to make Olaf, an elf, and your favorite superhero too!

Here is the link again: http://kixcereal.com/kix-cereal-paper-plate-christmas-characters-santa-rudolph-snowman/. Have fun!

Monday, October 27, 2014

Paper Dinosaur Hat

Trick or Treat is just three nights away! Do you already have your costume? How about a dinosaur? If you're still not sure what you want to be for Halloween just click on the link at the end of this post to find out how to make a dinosaur hat with spikes that go down your back!